How to get set up
User manual
Important: You need to set your service types for pricing, and to edit the placeholders we created for you.
Next, you need to set your types of courier service so you can individually price each type of delivery. Click ‘Couriers’ ![]() ‘Service Types’ option at the top of dashboard on the navigation bar.
‘Service Types’ option at the top of dashboard on the navigation bar.
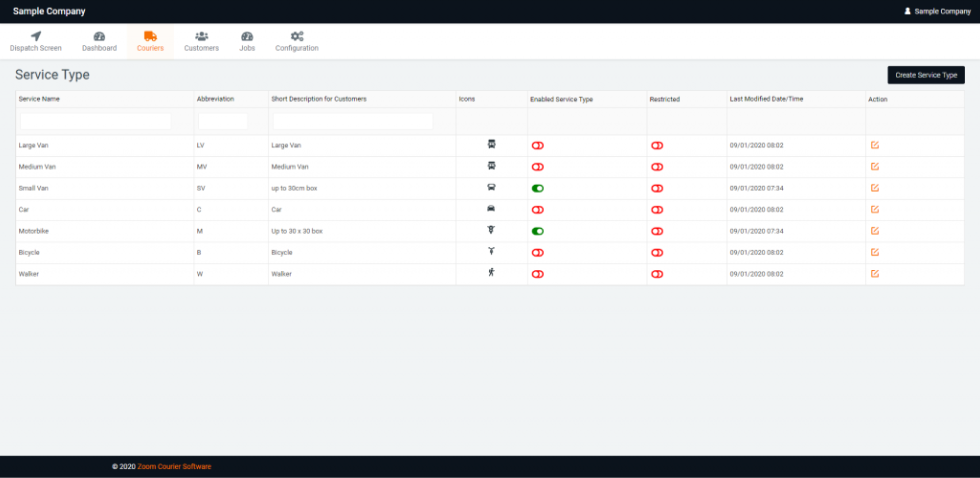
In Courier Types you can:
• Set the vehicle type whether Walker, Bicycle, Motorbike, Car, Small Van, Medium Van, Large Van.
• These options should match your fleet, and you can type in the package size that you need the type of courier to carry.
• You can also create new services, and choose to restrict them if needs be. The advantage of restricting services is if you have specific customers you do a special deal for. You add a restricted to a customer in customer options.
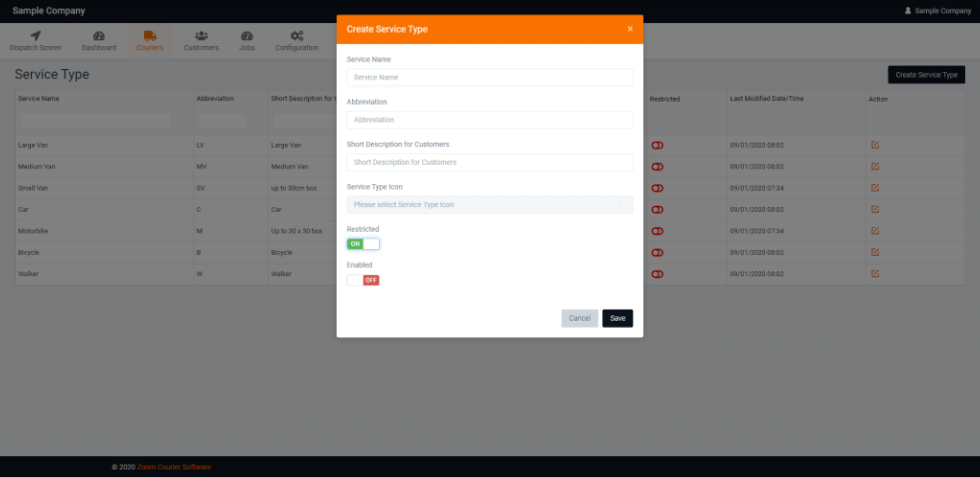
For Example:

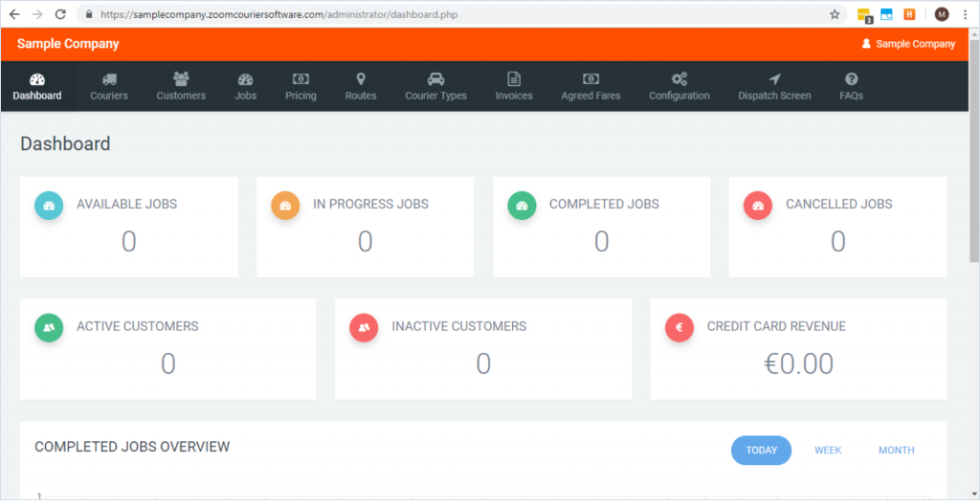
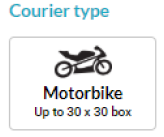
This will be displayed on your public Zoom sub-domain
(e.g. https://samplecompany.zoomcouriersoftware.com/ ) like so:
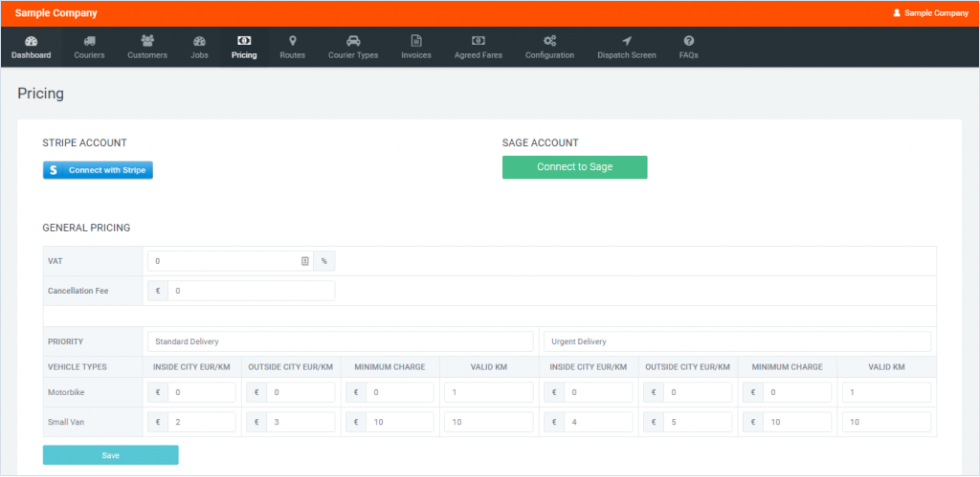
In pricing you can:
• Connect your Stripe account.
• Connect your Sage account.
• Set VAT rate.
• Set cancellation fee.
• Set the name of delivery types (e.g. Standard, Priority, Urgent).
• Set the pricing for each courier type inside city limits, outside city limits, minimum
charges and range.
Important: You need to set pricing for your couriers on the pricing page when you first begin, or else you will not be able to get accurate price calculations for your journeys.
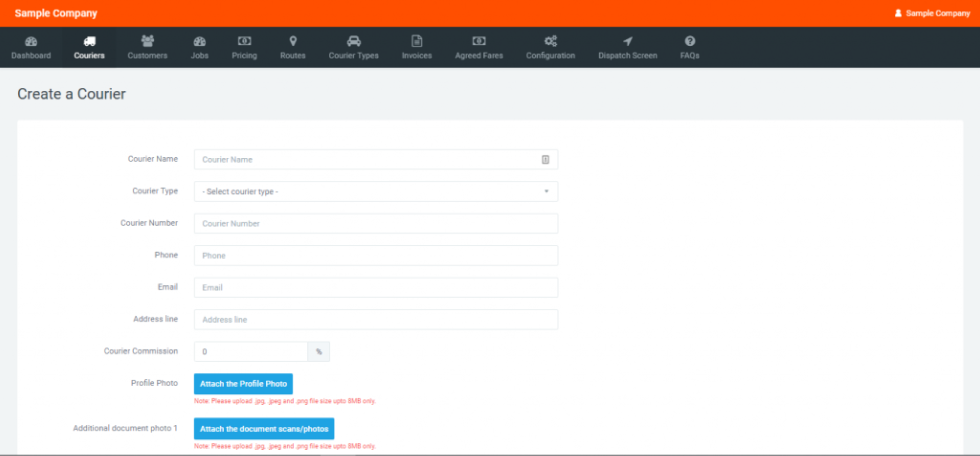
On the Create a Courier page you can:
• Add a courier name.
• Select a courier type.
• Designate an ID number a courier.
• Add courier contact details.
• Specify commissions for individual couriers.
• Add courier photographs.
• Add courier documentation.
After you create a courier, they will receive an email with a link to download the app, and a brief tutorial of how to use it. A courier can then be assigned jobs, take jobs, use the wayfinding feature and change their availability status on the app. As an administrator/dispatcher, you can use the Couriers drop-down menu to search couriers or send a push notification to one or many couriers at once.
1.4 Agreed Fares – Map Areas
In the ‘Agreed Fares’ dropdown, you can select ‘Map Areas’ to assign fares to certain areas on the map. This allows you to price based on distance and the area your drivers work in.
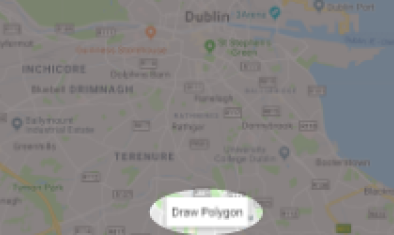
Down at the bottom of the ‘Map Areas’ section, you can select the ‘Draw Polygon’ option to designate areas for operation.
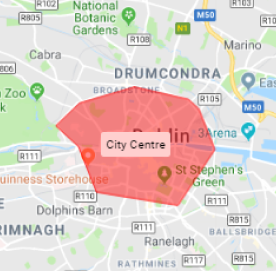
You can then draw a polygon by clicking around the area you wish to designate. Complete drawing by creating a shape. You can then name the polygon and reference it in future.
1.5 Agreed Fares – Fares
NOTE: The purpose of the ‘Agreed Fares’ section is to set specific pricing in areas separate from the city map space from ‘1.2 Public Profile’. Agreed Fares polygons always take priority over your city map polygon. If the areas ever overlap, the customer will be charged for the Agreed Fares prices if it is assigned to them, not the city map.
From the dashboard navigation bar, click the ‘Agreed Fares’ dropdown, select the ‘Fares’ option. You can then select ‘Create Pricing Tier’ in the top right to set initial prices. You can also decide whether to apply this to all customers or set a price for an individual customer.
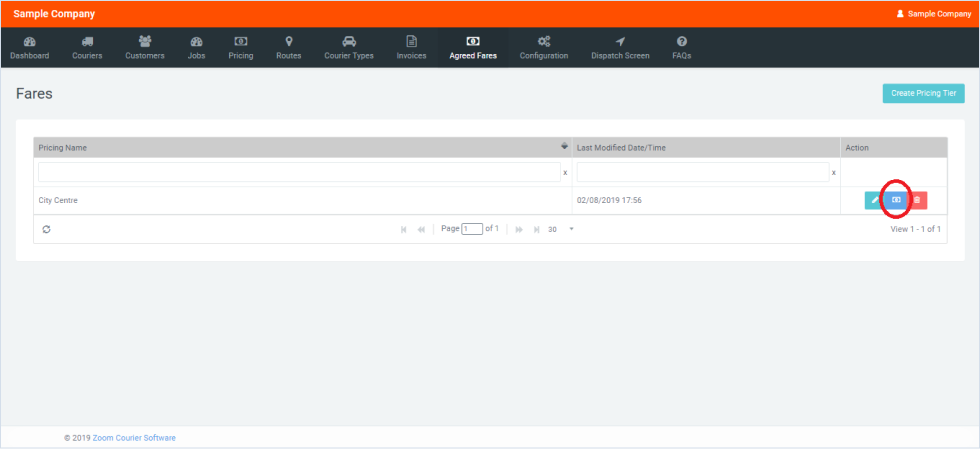
On the ‘Fares’ page, we have the ‘City Centre’ option we created before.
When you click the Set Pricing button (highlighted) you get the ‘Set Pricing’ screen below.
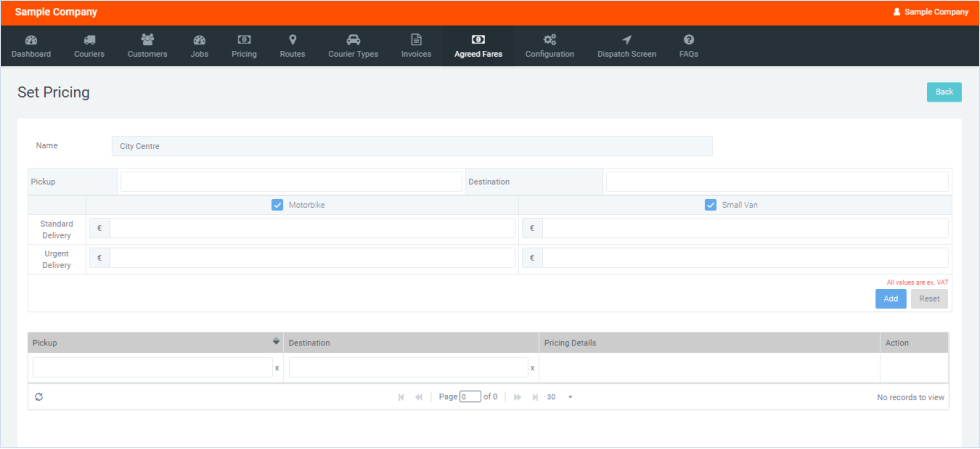
1.6 Agreed Fares – Fares – Set Pricing
As we have set a zone in the city called ‘City Centre’ in 1.6 Agreed Fares – Map Areas, now we need to set prices for the zone. On the ‘Set Pricing’ page, you can set the price for each ‘Courier Type’ within a zone. These courier types need to be created by you before this step (seen in 1.3 Courier Types above), but may be created by Zoom support staff when you set up. You can also change the name of a zone and the capability to apply the pricing zone to all of your customers by clicking the ‘Edit’ button. You can also delete a map area here, then redraw it in 1.6 Agreed Fares – Map Areas.
Your company is now set up on Zoom! Continue reading for further information on Creating Customers, Jobs, The Dispatch Screen, Invoices, Routes and Site Configuration.
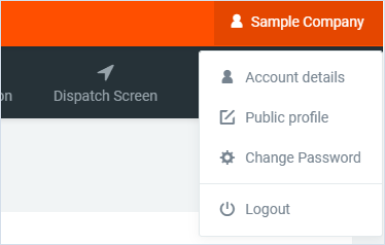
1.7 Account Profile (Private)
In the top right hand corner of your screen, click your company name. This displays the profile drop-down menu.
You can change details for both the private and public parts of your account here. Your private account details include your name, the email Zoom can contact you with, your address and your Zipcode/Eircode.

Important: You should update your profile immediately (including the ‘City’ map) on first log in, as they will either be empty or filled with placeholder information. You can remove the placeholder city map and put in your own by clicking ‘Remove’ in the top left corner of the map.

Here, you can add the Customer Name, their Company Name, Phone, Email, Address, Postcode, their Customer Discount (specifically for them), their agreed Pricing Tier information which is set in Agreed Fares Fares, and to designate whether they are a Corporate Customer or not.
NOTE: Setting a pricing tier for every customer is not mandatory. If you want special fares for a specific customer then set a pricing tier in Agreed Fares Fares.
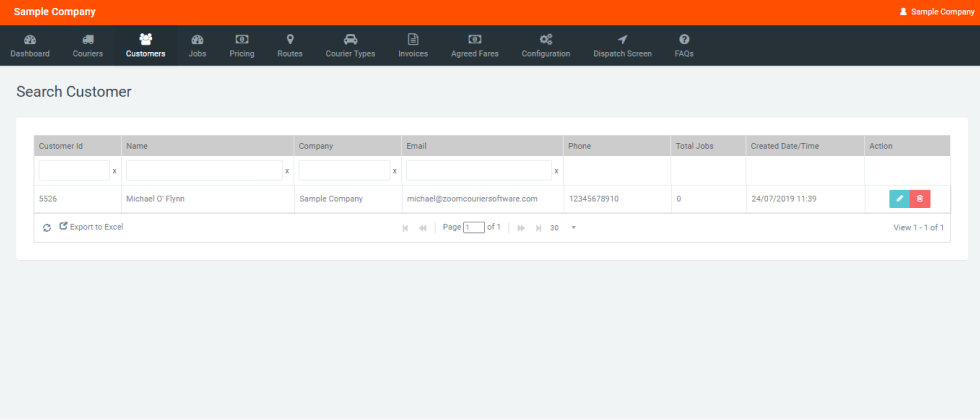
The Search A Customer page lists a Customer ID, Customer Name, Company, Email, Phone Number, Total Jobs, Created Date/Time and an Edit Customer/Delete Customer option. Customers be sorted by Ascending and Descending order with each of these options.
2.3 Customer SMS Gateway
The customer SMS Gateway allows automatic communication between drivers and customers when packages are out for delivery.
To activate this feature, please contact Zoom Courier Software customer support at hello@zoomcouriersoftware.com.
Please note that the Customer SMS Gateway feature may incur additional costs.

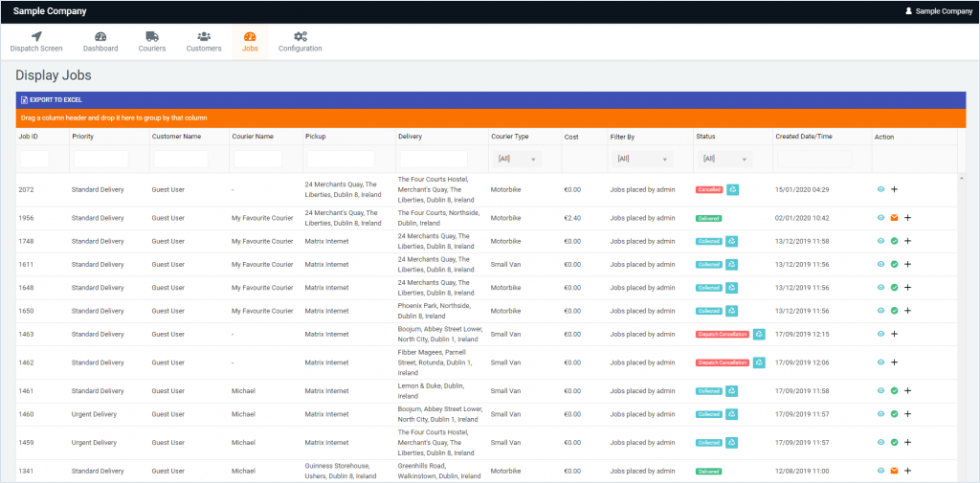
Search Jobs allows you to search and order your job history by Job ID, Priority, Customer Name, Courier Name, Pickup Location, Delivery Location, Courier Type, Cost, Filter jobs paid by card/jobs on company accounts, jobs created by an administrator, job status, created date/time and action.
Scheduled jobs allows you to view a list of currently scheduled jobs. Jobs are listed with the option to search and order by Job Schedule, Scheduled Date/Time, Scheduled Type, Customer Name, Courier Name, Vehicle Type, From Address location, To Address location, Cost, Created Date and Action.
The map on display here is the one you set in your 1.2 Public Profile Delivery Area Map. You can edit your profile by clicking on your company name in the top right of your screen and selecting Public Profile from the drop-down at any time.
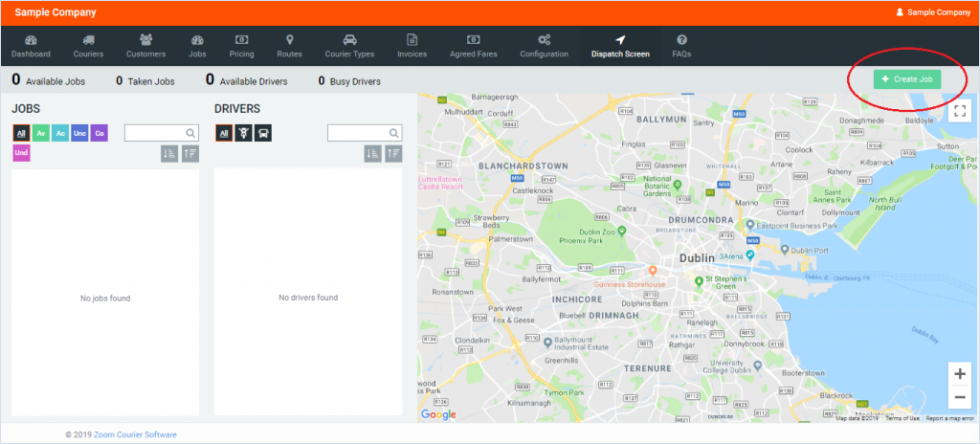
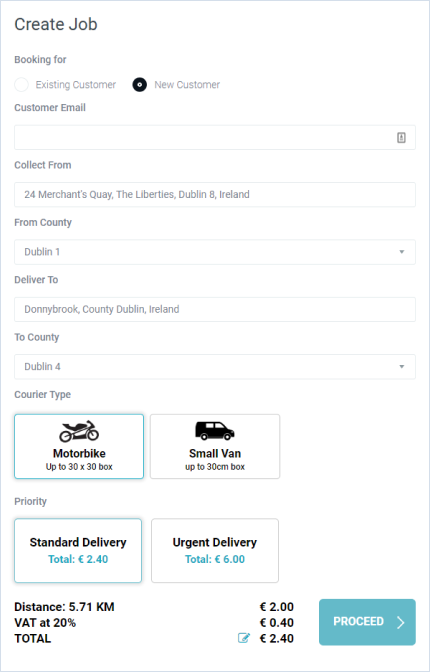
Create Job Stage 1 of 2
1. Clicking the Create Job button opens the Create Job panel on the right side.
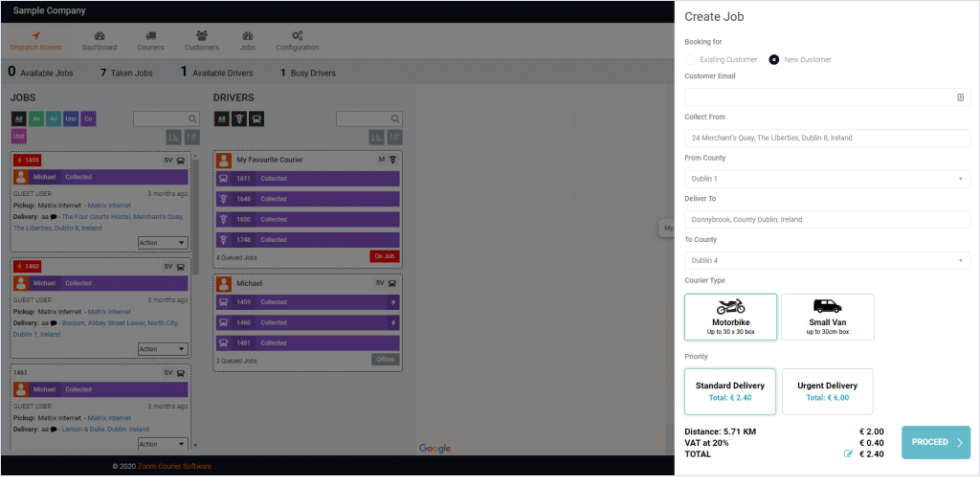
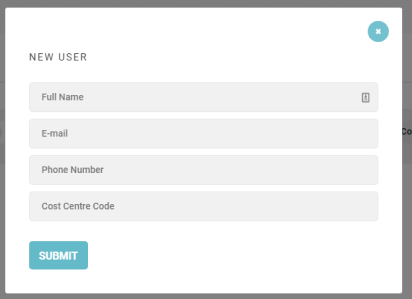
2. In the Create Job panel you can either use an existing customer that you’ve created before in 2.1 Create a Customer, or you can select New Customer to quickly create a new customer.
3. With an Existing Customer, you can input an existing customer via their User ID, Name or Email Address, you can select the matching option which will appear below.With a NewCustomer, you need to input their email.
4. You can then set ‘Collect From’ and ‘Deliver To’ addresses, select the courier vehicle and
the delivery type.
Important: You will receive an error message when creating a job if you do not have your Stripe account connected to Zoom and are not within our Free Trial Period. You can connect this in 1d. Pricing.
5. The calculated distance, custom pricing and ‘proceed’ buttons are then displayed, as below.
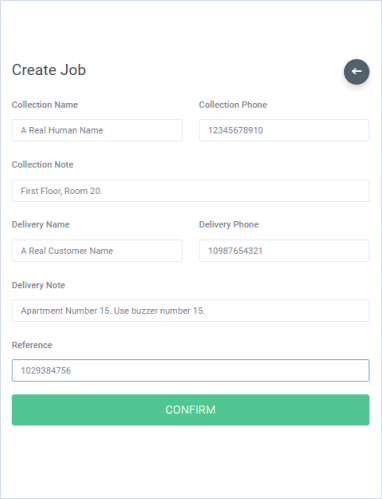
Create Job Stage 2 of 2
After clicking ‘PROCEED’, fill in the second stage of the ‘Create Job’ form (example below). You can use the arrow button in the top right to go to the previous screen at any time.
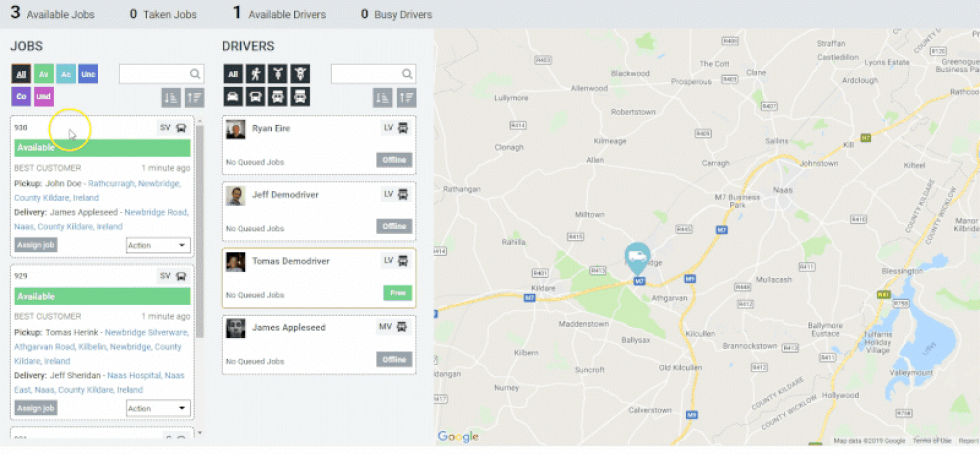
On clicking ‘CONFIRM’ your job has been created. It will appear on the dispatch screen along with the route plotted out in the map, as pictured below.
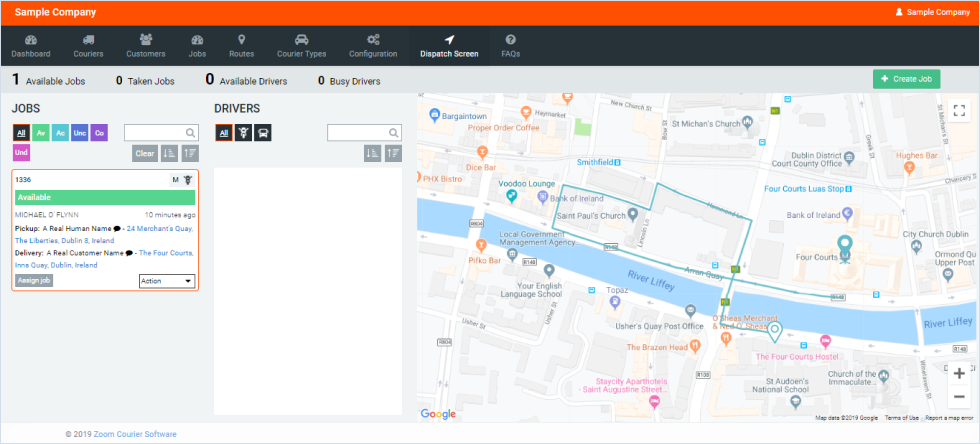
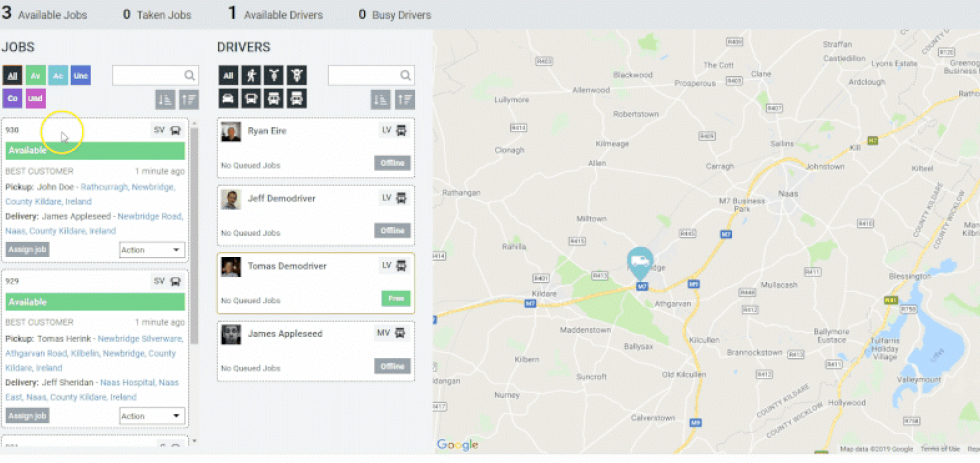
Simply drag and drop the job onto your courier of choice and it will be queued for them.
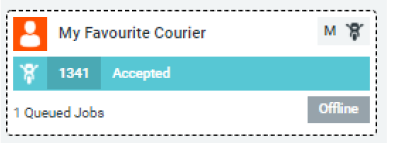
Note that the courier above is offline, this is because they have not flagged themselves as available on the app. A courier needs to download the app to their phone from:
IOS:

Android:

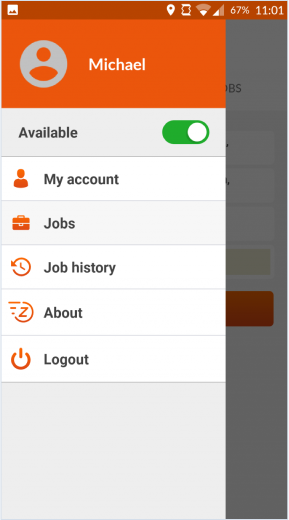
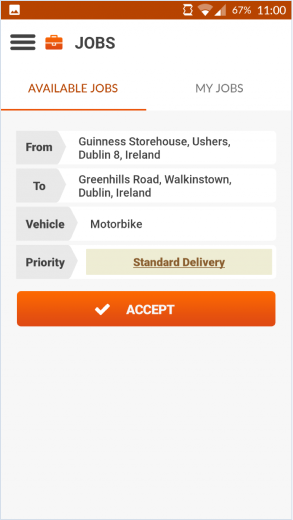
Your courier then needs to log in on the application through the activation email sent to them after you created them as a courier. Through the application, a courier has the ability to flag themselves as available and manually accept a job. As soon as a courier is ‘available’, their location is displayed on the dispatch screen until they turn it off again.

Courier Sequence
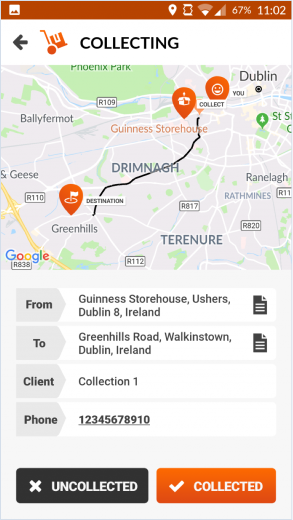
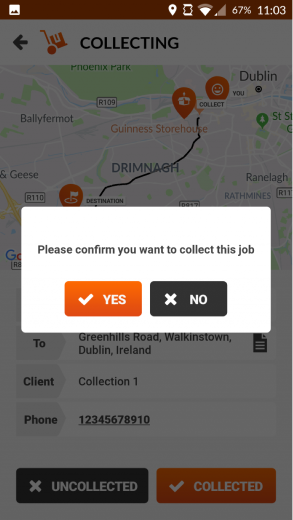

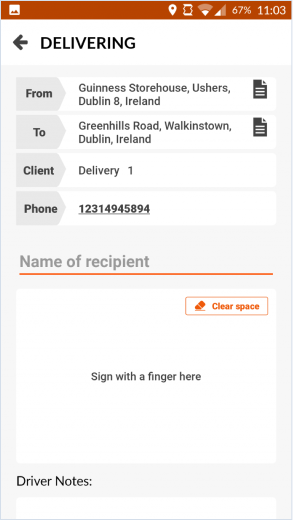
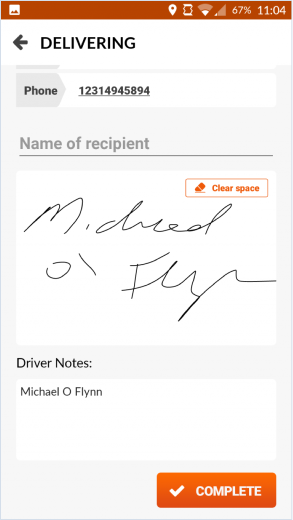
From creation to completion, the job is logged in the ‘Jobs’ ‘Search Jobs’ option in the navigation bar. The invoice for the job is logged in the ‘Invoices’ option in the navigation bar.
Then, update your courier commission amount and hit <strong>‘Save’.</strong>

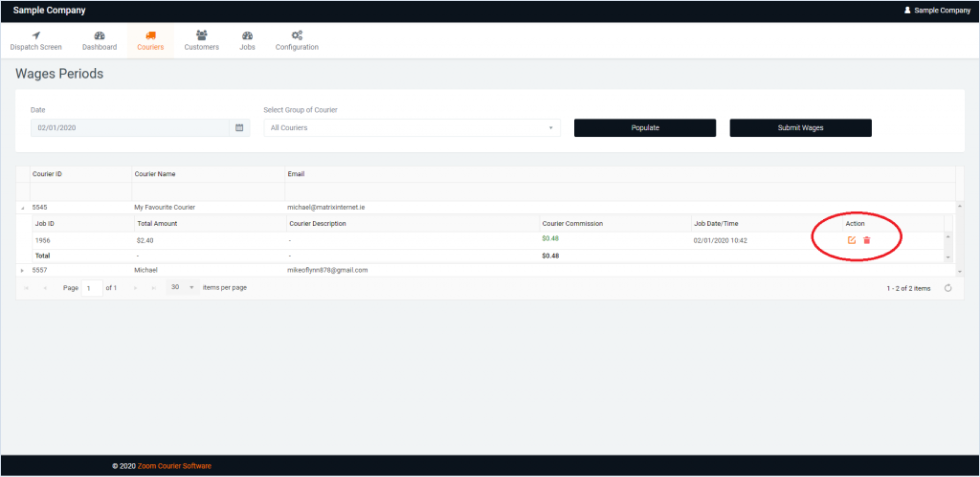
Now, if you go to Couriers Wages Wage periods and set the date to the day where that courier completed a job, click ‘Populate’. You will now get a list of your couriers. You can select and expand on that courier to see their wages.

You can also edit the commission quantity after the fact, or remove it on a specific job.
4.5 Courier Bonuses and Deductions
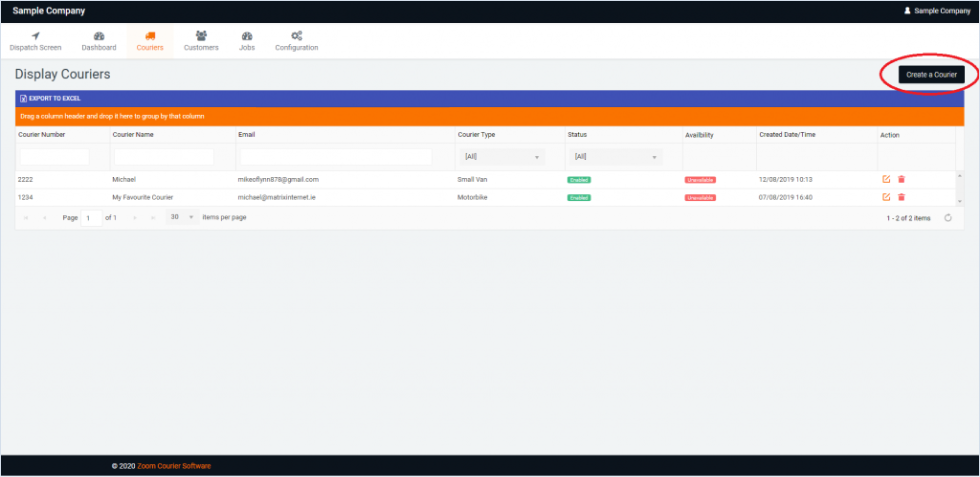
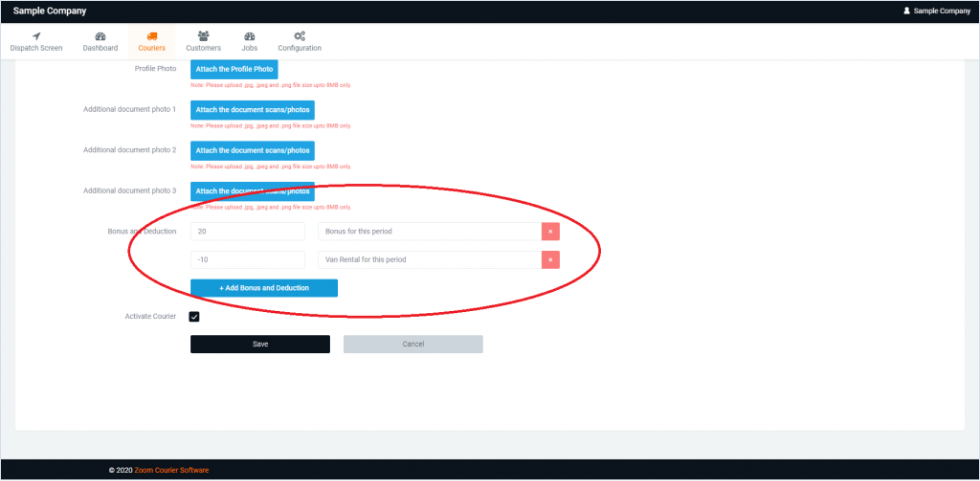
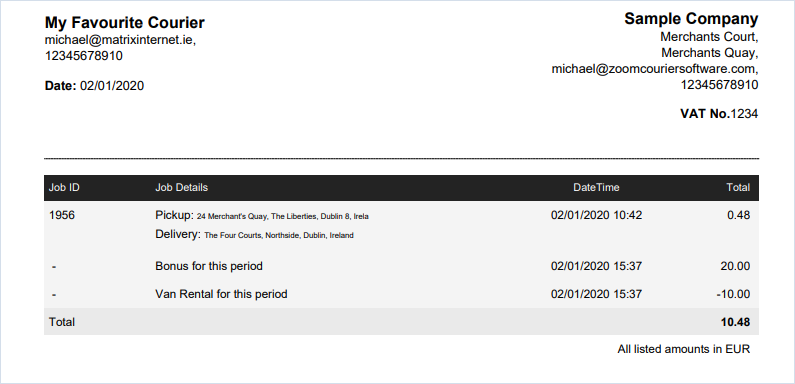
In Couriers Display Couriers, select the edit button to add a bonus or deduction. This can be useful if you are doing bonuses for the Christmas period, or deductions for van rental for example.
Note: If you fill in a positive number (+20 for e.g.) this will give a bonus of 20 of your local currency (e.g. Dollars / Euro) to that courier for this period. If you fill in a negative number, (-10 for e.g.) this will give a deduction of 10 of your local currency to that courier for this billing period.
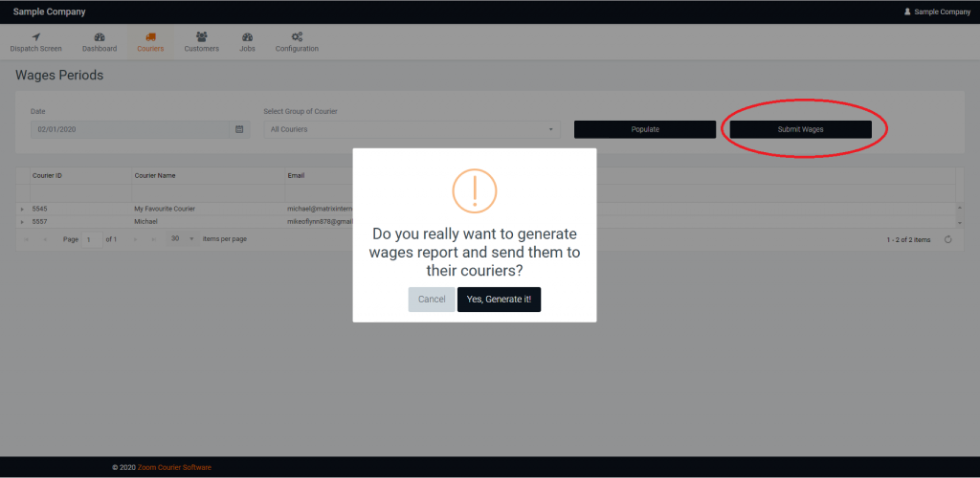
This will send a PDF wage report out to all of your active couriers.
Note: This will only send a PDF report, Zoom Courier Software does not send out wages – that has to be done manually.
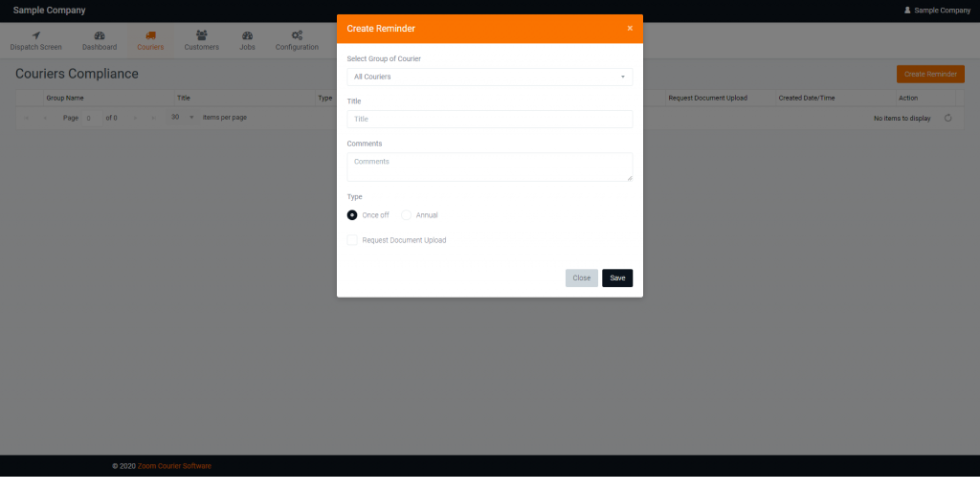
4.8 Courier Compliance Management
Courier compliance management allows companies taking on couriers (whether through Zoom or elsewhere) to request document uploads or agreement to contractual obligations / terms and conditions through the app.
Two document options can be selected in courier compliance management: an upload request (e.g. a certification) or a ‘read and agree’ type of document, where a confirmation checkbox is selected by the courier upon reading the document.
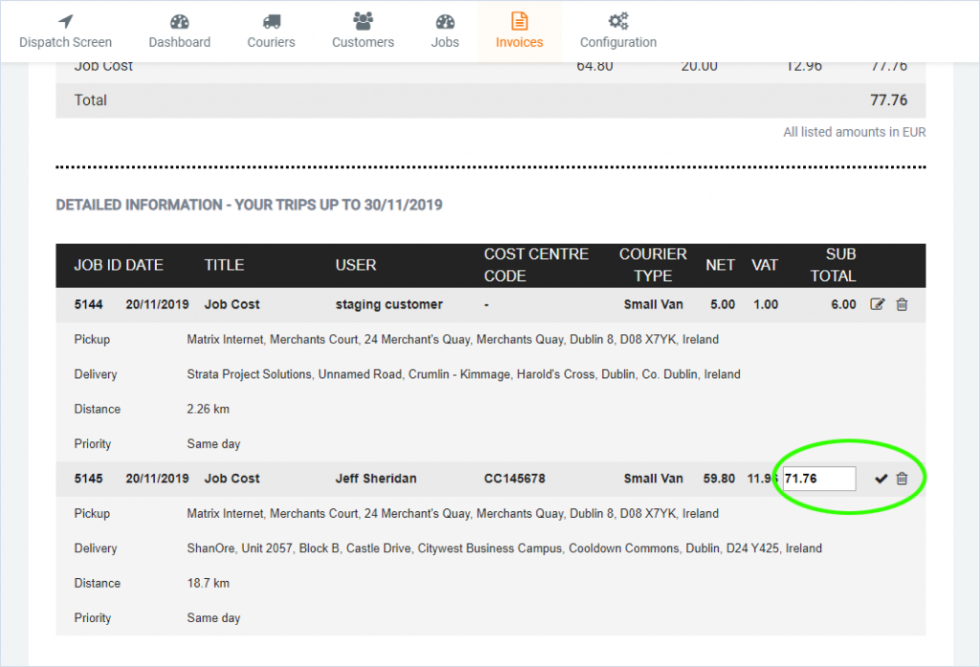
5. Invoices
Note: Invoicing is not a required element of Zoom but is commonly used. If you don’t require invoicing for your business, please contact our customer support at hello@zoomcouriersoftware.com to disable invoicing.
On the invoices page, your invoices for each job are logged. Jobs are searchable by multiple criteria including:
• Invoice Number.
• Customer ID.
• Customer Name.
• Total Amount.
• Month/Year.
• Total Unpaid.
• Generated Date/Time.
• Payment Status.
• Invoice Status.
• Invoice Type.
• Action.
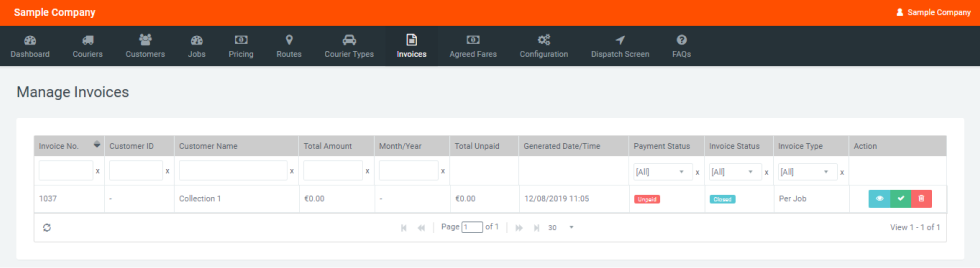
Clicking the Eye/View symbol on an invoice gives you a more detailed view of an individual invoice.
The green ‘Tick’ symbol allows you to mark an invoice as paid and attach a note. The payment status and invoice status is changed to ‘Paid’ and ‘Closed’ respectively, and you have the option to download the invoice as a PDF file.
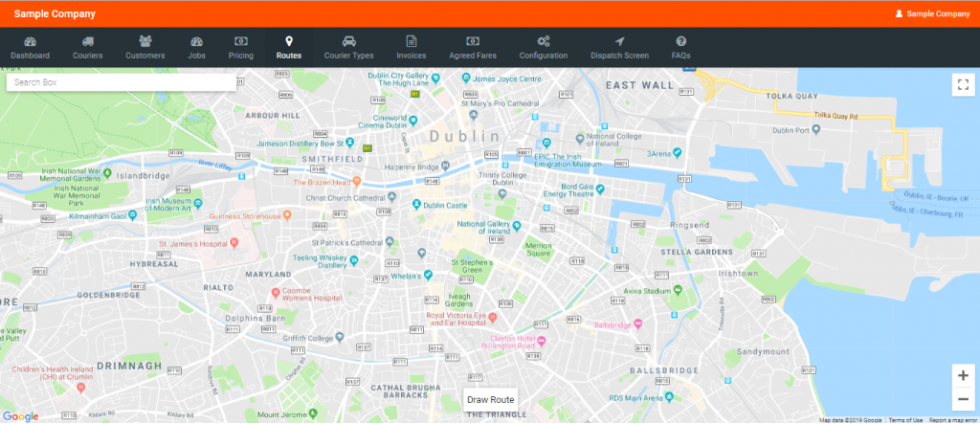
To use the Routes page, click the ‘Draw Routes’ button down at the bottom.
You will then be faced with a screen like the image below
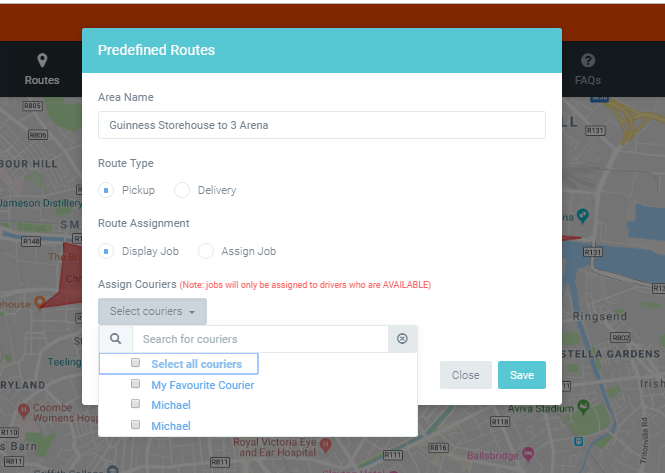
You can name the area, define the route as a pickup or delivery route, whether to display the job to all or specific couriers, or immediately assign the job to a courier.
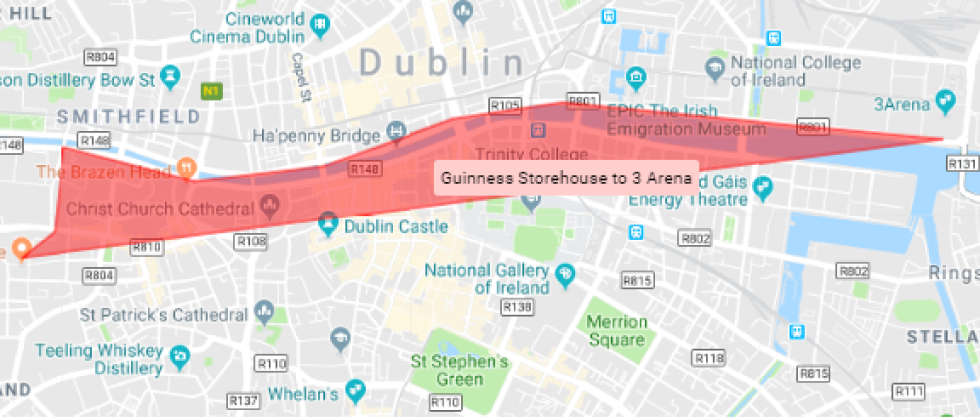
You can edit the details or the shape of the polygon for these delivery/pickup routes at any time by right clicking on the polygon.
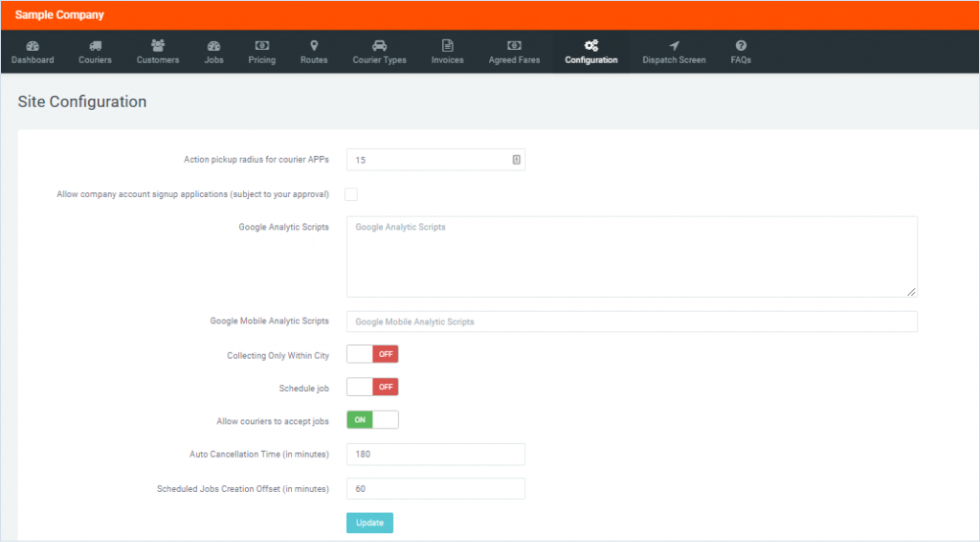
On the site configuration page you can change:
• The action pickup radius for courier apps (in miles/kilometers depending on your
preference)
• To allow for company account customers (billable at end-of-month).
• Ability to set to collecting only within city (drawn in public profile page).
• Ability to schedule jobs.
• Allow couriers to accept jobs, or make them dispatcher-assigned only.
• Auto cancellation time.
• Scheduled jobs offset.
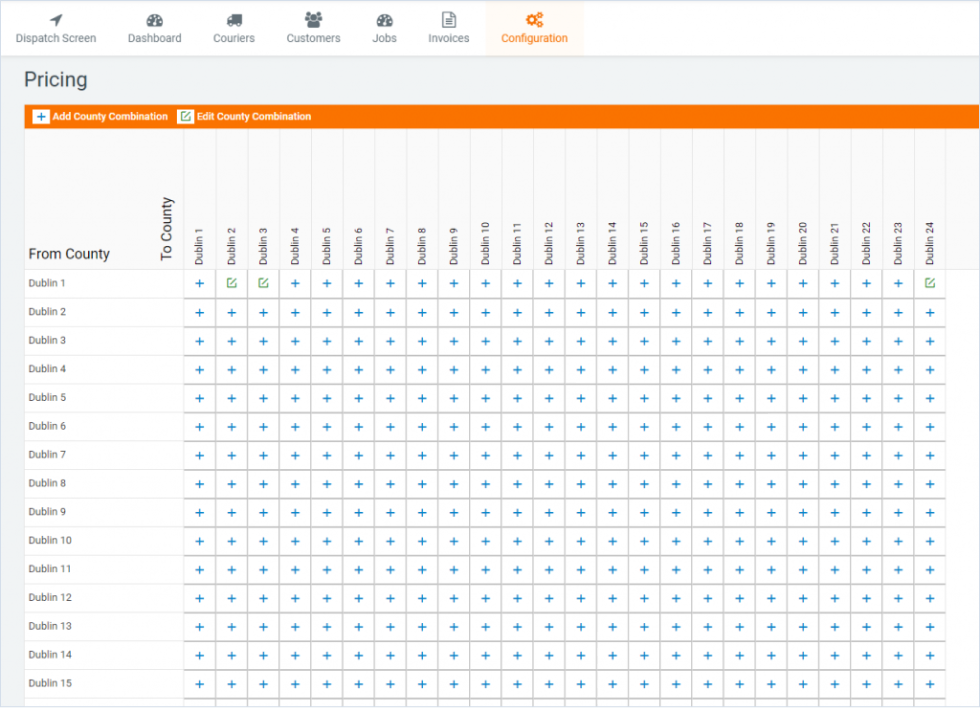
7.3 County-Based Price Matrix
The county-based pricing matrix can be customized by you to match the counties you deliver within. Simply ask our customer support at hello@zoomcouriersoftware.com to enable the price matrix if you require this feature.
When it is enabled, the price matrix can be accessed from Configuration Pricing Matrix Manage counties. You can then add your county, then continue to Configuration Pricing Matrix Pricing to assign pricing.
Assign pricing here in the ‘From’ and ‘To’ columns.
Speak with our expert today
Lorem ipsum dolor sit amet, Magna Justo Erit.